Friday, April 30, 2010

Welcome to the MScraps Blog Train: Freebie Mini-Kit!

In honor of interNational Scrapbook Day, I have the pleasure of offering you a freebie: this little mini-kit "Softer" which coordinates with the mega-collab Sonny {heart}s Candy this month at MScraps (which is FREE with any $10 in purchases!):


Just click on the image to begin downloading it!

And, here's the blog train list--there are three tons of GORGEOUS quickpages, paper packs, templates, and more designer mini-kits. I've highlighted where you are!

- START BLOGTRAIN { MSCRAPS FORUM}:
- Raji - template freebie for the MScraps Forum
- Biancka -  http://biancka.blogspot.com/
- Bren - http://brentboone.typepad.com
- Hazelolive - http://www.hazelolivedesigns.com/
- Kaleandkiara   -www.brendasmithdesigns@blogspot.com
- Biancka  - http://biancka.blogspot.com/
- Che - http://che-yang.blogspot.com/
- Gonewiththewind - http://cherylisadomesticgoddess.blogspot.com/
- Damayanti Studio  http://damayantistudio.blogspot.com/
- EHStudios  - http://blog.through-my-eyes.org/
- Elo Designs - http://elodesigns.blogspot.com/

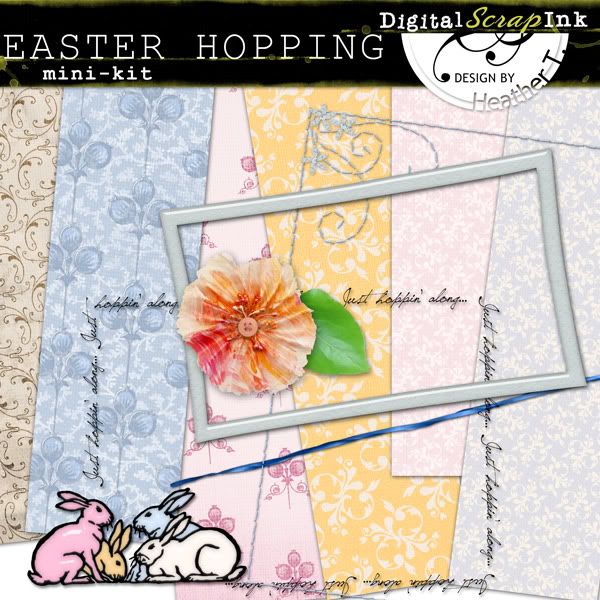
- (you are here) Design by Heather T  http://oohlalaartsy.blogspot.com

- I-Scrap -  http://i--scrap.blogspot.com
- Joyce - http://joycepauldesigns.blogspot.com
- Kat -  http://katdesignsbykjersti.blogspot.com/
- Twenty Tiny Toes-  http://trytokeepupwithourcrew.blogspot.com/
- Inklover  -  http://fromleilani.blogspot.com/
- AD77  - http://ad77design.blogspot.com/
- Nia kariani  http://amnia.blogspot.com
- Mi Monteiro  http://scrapmimonteiro.blogspot.com
- milo82 - http://past-present-inspiration.blogspot.com/
- Phoebe - QP http://am2happy.blogspot.com/
- QoQo - http://qoqostudio.blogspot.com/
- Ruth Melody - http://ruthmelody.blogspot.com/
- Sabrinavc -  http://sabrina-creations.blogspot.com/
- mom2peanuts  http://justscrappinformgirls.blogspot.com/
- Polly and Rufus  - www.pollyandrufus.blogspot.com
- Three Paper Peonies - www.threepaperpeonies.blogspot.com
- TracieS - http://www.traciestrouddesigns.com/blog/
- Valorie - http://valoriebrowndesigns.com/blog/
- Vesi -http://vesidesign.blogspot.com/
- Topsi - http://scrap-art-designs.spacequadrat.de/
- LAST STOP {MSCRAPS BLOG} - Kelly  - http://mscraps.com/blog

Please do stop by MScraps, though. There are tons of challenges all day, every two hours, with prizes galore -- but most importantly, a lot of super-friendly nuttiness! 

Thursday, April 29, 2010

NEW STORE: MSCRAPS!!!!!!

Holy designeroli, am I excited to be joining this fabulous new store! Here's what I've got for you:


Everything is 30% off till May 1! (Except if you become a fan via FaceBook, and then I've got a little surprise for you =)

Monday, April 26, 2010

Two Dollar Tuesday

$2.00 Tuesday -- Just for one day, buy 3 of my kits normally priced $4.99 for $2.00 apiece @ The DigiChick!

Are you getting excited for iNSD (interNational Scrapbooking Day)?? I sure am!! I'll have a ton of new stuff coming out... and a surprise!!

Here's a taste:


Wednesday, April 21, 2010

New Kit @ The DigiChick: Party!!

I'm not sure what made me go nuts on the colors, but there you are! Party on, dude! (Heh, which reminds me that in my graduate student [uh, party] days, our neighbors once spelled out DUDE on our front door step in M and M's. Why they did this, I have no idea. But I do have photographic evidence--somewhere.)


An explosion of party spirit for your fun celebration layouts! Popping with color and filled with cool elements, you might just have as much pleasure scrapping with this kit as you actually had on the party day!
Kit contains:

  • 16 papers, textured patterns & solids
  • 4 frames
  • 6 pieces of word art (some in different colors)
  • 2 different paper ribbon curls
  • 1 fiesta bear
  • 2 borders (both colored and black)
  • 1 candle sun
  • 1 little box
  • 1 bag of goodies
  • 1 singing birdie
  • 1 stitched border (2 colors)
  • 1 ball spray
  • 1 glitter spray
  • 5 balloons
  • 2 flowers and 1 leaf
  • 1 epoxy heart
  • 1 circle overlay
Note: All items 300 dpi. Papers 12x12". Shadows for preview purpose only.

And of course it's on sale through Friday!

Tuesday, April 20, 2010

Stamping

Today was my day to play with inks and paints and take care of my stamping obligations. I really enjoyed this one:


Stamp is my design through Art Neko. Background was brayered Ancient Page dye inks on glossy, with a little marker for the grassy stuff. Top crane stamped with Ancient Page Coal Black, and bottom one with Versacraft Black, then Ranger Clear embossing powder. I colored it with a little Scarlet Colorbox pigment ink, and some Golden acrylic. To do it, I stamped the bottom one first on my stamp positioner plate, then turned that over onto the prepared background. Gotta thank my friend Barb Adams for that technique suggestion!

Sunday, April 18, 2010

Thursday, April 15, 2010

Collaboration with JM Designs: Little Boy Bluebird @ The DigiChick!

Check out this cool little collection:


Besides the fun little drawings, it's also got some very luscious papers:


You get 16 papers and over 50 elements: nature elements, splats, grunged frames, little boys and bluebirds, ribbons, buttons, stitching, flowers... A totally fun collection! And LOOK what my awesome CT made with it:

By Ulla-May:


By Natalka:


By Julie:


And by Jen:


Are those not super-awesome? Hurry by to get the collection--it's 20% off through Friday!

Wednesday, April 7, 2010

A Couple of Layouts


Everything with "Change" by Three Paper Peonies @ MScraps. Font: DB Poetic. "Little by little, day by day... six years have gone by. April 2004 (1 year old) to April 2010..." =)


For the color challenge @ MScraps (I'm purple). Am I not fortunate to live in such beauty? Everything from the MScraps Collab Fortunate, with papers by Kelly Mickus & Sabrina. Flower also by Kelly Mickus. Wordart by Three Paper Peonies.


This kit is MONSTER! Everything from the "Fortunate" collab @ MScraps (last month's Digi Files @ the Daily Digi). Wordart says: Fortunate to have you in my life--and that's sure what I feel about this little boy!


Everything with Joyce Paul Designs @ MScraps, from her "Lovely Day" kit. Fonts: Sunshine Poppy & Auburn. Journaling reads: "A real, unironed shirt, a pensive expression, hair wet from the shower, in motion, as usual; a neck growing strong, definitely legs growing long: this is you, young sprout in March of 2010."

Did I mention that my Sunshine Poppy font got accepted at dafont.com? I'm so pleased. =)

And have I mentioned that I really like these MScraps guys?? They have terrific stuff, and you know I'm all about STUFF! *giggles* Plus, the forum is rockin'... I'm enjoying hanging out with all my old friends from Pixel Canvas!

Saturday, April 3, 2010

Easter Hopping!

Want a free mini-kit? Find one of these eggs over at the DigiScrapInk site:


I've hidden eggs in the products, in the gallery, in the forum... but quantities of clicks are limited (and will be gone after Monday)! Here's a preview of the freebie mini-kit:


Happy Easter, to those of you who celebrate it!

Thursday, April 1, 2010

Typography Challenge!

This month @ The DigiChick is all about “What’s new?” Although we’ve lived here on the coast for 3 years now, the beach and the ocean are still a very new thing to me, and continually astonish me.

For this first type challenge I’m going to focus on using VERY LARGE TYPE as the basis for the entire layout. When you use very large type, it’s really easy to use it as a clipping mask for photos, and it gives some interesting shapes to your page. To give this a twist, I’m also going to suggest that you use your photo’s central figure as part of the clipping mask. Don’t worry, this is easy to do!

First of all, here are some samples:

Subgrafix @ Deviant Art:


[image]

Dronograph @ Deviant Art:


[image]

See how the type blends in with what’s going on in the background?

Here’s how I’ve translated it into a layout:

[image]

And here’s how to do it:

1. Look for a photo you like, preferably with a strong visual component with clear outlines, such as a person or flower or building. You are going to ADD this outline over, under, in the middle of, or somewhere attached to the type.

2. Think about what the theme of the photo is. Do several words come to mind, or just one? Write it/them down on a piece of paper and play around with how they might stack or be squooshed. Write it out in all caps, and in lower case. Think about where the silhouette or outline of your central figure from the photo might fit (sides, top, bottom, middle).

In my case, I focused on the strong triangle formed by my son’s stepping from rock to rock, which suggested the A. And in the first example above, you can see the woman’s shape by the side of the letters.

3. Choose a strong typeface that will work with your theme. You want something pretty thick, but you also need it to be legible, so don’t pick anything with really fine lines that will get lost. Start your layout and put the type there.

Note that you don’t have to use a font that’s all caps, or one that’s super, super-black. For mine, I actually used Charlemagne, but I also like Zepp — or really, just about anything will work unless it’s too fancy. Heh. =)

4. Pull your photo into the layout, on the bottom layer. On a NEW layer a
bove the photo, take your marquee tool (lasso or straight edge lasso) and vaguely outline your central figure. It doesn’t have to be perfect, just ballpark. Fill the shape with black. Now hide your photo.

5. Continue arranging the type and the figure you just outlined until they all fit together in a pleasing fashion.

6. Highlight all the layers that have letters or words on them, and the outline layer (ctrl+click on the appropriate layers) then merge them (ctrl+e) [or go to Layer-->Merge Layers (down at the bottom of the menu), or right click and choose merge layers]. Now you should have just one layer with black shapes on it. This is what you’ll use as your clipping mask.

7. Make your original photo visible, and drag it above your mask layer. Press alt+ctrl+g if you’re using Photoshop CS+, or just ctrl+g if you’re using PSE, or whatever “Make Clipping Path” command your graphics program has.

8. Ta dah! Now your photo is showing up in just the shapes of the text and image. At this point you can start creating a collage of photos to fill in the blank spots, or you can add brushwork to the mask layer itself by using a grungy brush to include some of the background of the photo (that’s what I did in mine; I also used the Burn tool and a paintbrush on the photo layer itself to make some of the rocks darker where my letters were).

You can play around with using other doodle brushes to add or take away from the mask as in the examples, too. Just have fun with it!

Then, give it some dimension with a few elements, and add some journaling if you wish.

–>Remember that it’s supposed to be about what’s new for you! <–

Here are some more examples from the fabulous DigiChick crew:
Here’s another of mine:


By Jenn7:
 

By Heather B.:

By Vanessa:

Link me up either in the comments to this post, or in our challenge thread in the DigiChick forum. Of course you’ll get a little prize for participating!